镀金艺术字特效-Photoshop教程
来源 网页教学网 发布时间 2009-07-04
内发光效果设置
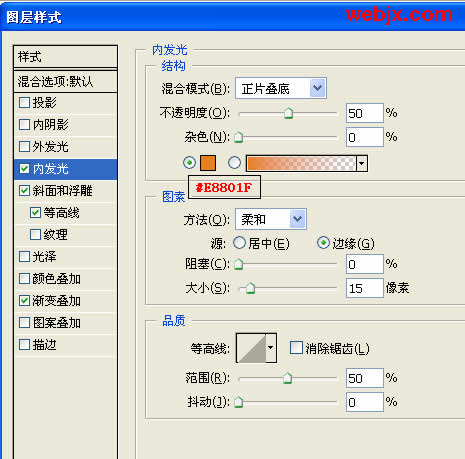


设置好的效果如下:
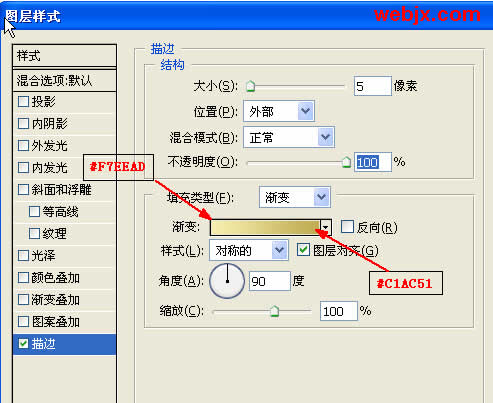
4、在回到原始文字层,然后设置如下样式。
描边效果设置
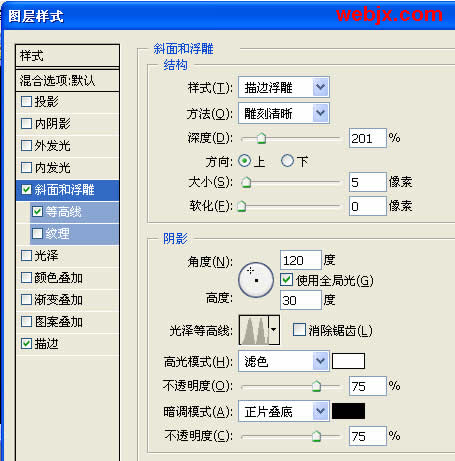
斜面和浮雕效果设置
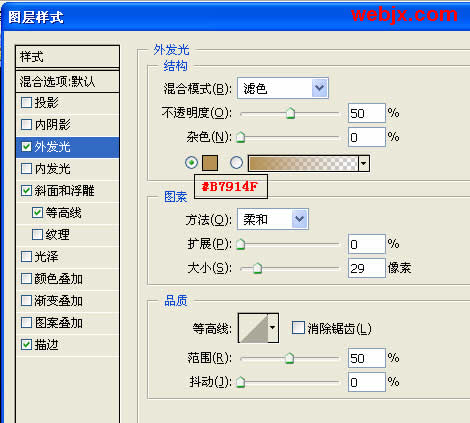
外发光设置
5、最后再添点发光效果,这样更酷。新建立一层,设置白色前景,笔刷设置如下,然后在合适地方绘制 发射状,并且调整图层的不透明度为50%。
调用画笔工具,设置笔刷
镀金艺术字特效的全部制作步骤完成!
| 上一页12 |