晶莹剔透、清爽水质感文字效果
作者 文/王伟光 来源 eNet 发布时间 2009-06-07
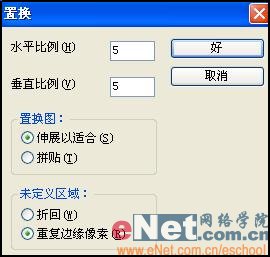
20、回到开始的文件,取消选区,复制背景层,然后在背景副本上执行“滤镜”“扭曲”“置换”命令,在弹出的对话框中,设置参数如图39所示,确定后,在弹出的对话框中选择PSD文件,效果如图40所示。

21、载入通道1的选区,反选选区,在背景副本中删除选区内的图像,取消选区效果如图41所示。合并背景层和背景副本层。

22、复制图层1,更改图层1副本的混合模式为强光,把图层1和图层1副本进行合并,效果如图42所示。

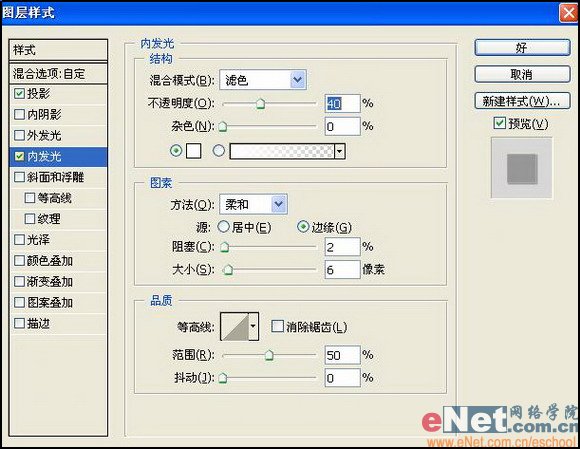
23、双击图层1,打开图层样式对话框,选择投影和内发光,设置参数如图43-44所示,效果如图45所示。


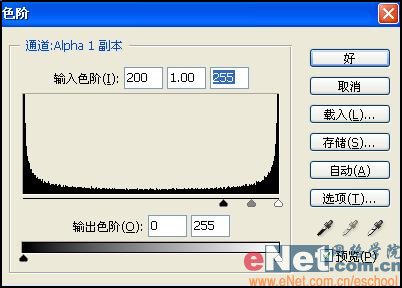
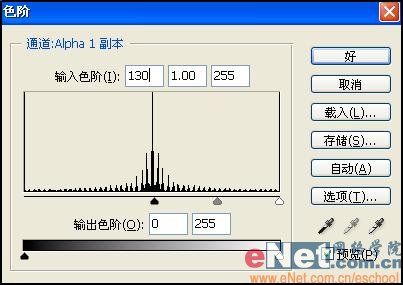
24、打开通道面板,复制通道1为通道1副本,然后对通道副本执行两次模糊滤镜,半径为3,接着按Ctrl+L键,设置参数如图46所示,效果如图47所示。

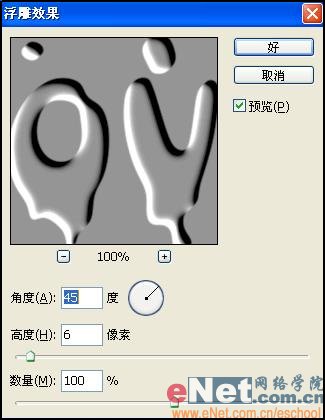
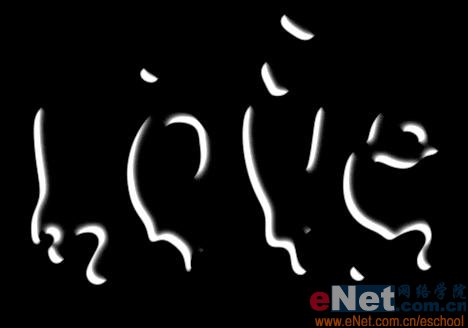
25、在通道1副本上执行“滤镜”“风格化”“浮雕效果”命令,在弹出的浮雕效果对话框中,设置参数如图48所示,效果如图49所示。

26、接着执行色阶命令,设置参数如图50所示,效果如图51所示。
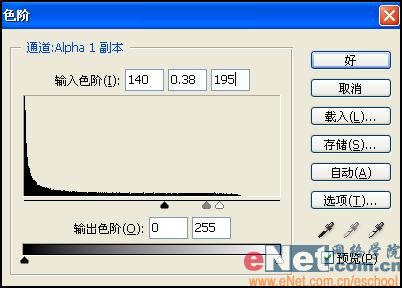
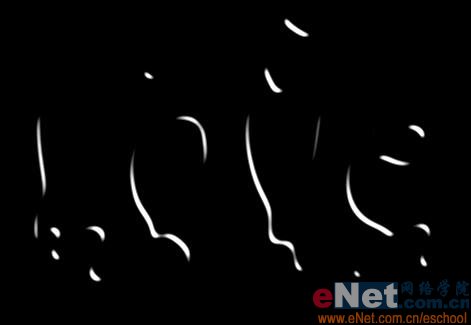
27、再次执行高斯模糊滤镜,半径为3,接着调整色阶,设置如图52所示,图像效果如图53所示。
28、回到图层面板,在图层1上新建图层2,载入通道1副本选区,并填充白色,效果如图54所示。

29、最后在水字上添加高光,新建图层3,选择画笔工具,然后设置背景色为白色,在图层3上绘制光点,最终效果如图55所示。

| 上一页1234 |