PS艺术字教程:动感点阵艺术字
作者 文/enet 来源 enet 发布时间 2009-04-20
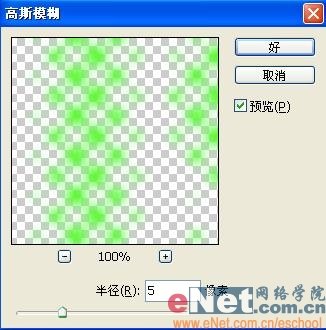
9、复制图层1为图层1副本。执行菜单栏中的“滤镜”“模糊”“高斯模糊”命令,在弹出的对话框中设置半径为5,如图10所示,图像效果如图11所示。

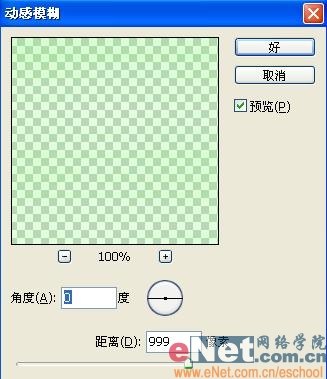
10、执行菜单栏中的“滤镜”“模糊”“动感模糊”命令,在弹出的对话框中设置参数如图12所示,图像效果如图13所示。

11、再次复制图层1,得到图层1副本2.单击工具箱中的移动工具,按键盘上的方向键来适当调整图像的位置,效果如图14所示。

12、设置图层1副本2的“不透明度”为15%,图像效果如图15所示。

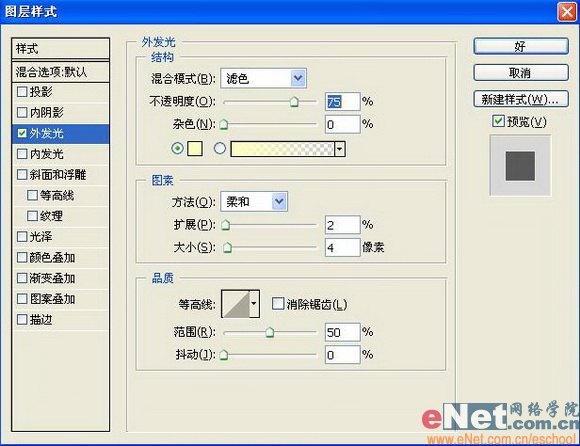
13、双击图层图层1,添加图层样式。在弹出的对话框中选择“外发光”命令,设置参数如图16所示,图像效果如图17所示。

14、复制图层1副本。单击文字工具,设置文字面板颜色为白色,输入文字,效果如图18所示。

15、将文字栅格化然后复制几层,执行动感模糊命令,最终效果如图19所示。

| 上一页12 |