制作照片折痕效果-PS艺术照教程
发布时间 2009-08-02
*示例教程所用Photoshop为英文版本,对英文菜单不熟悉的可参阅:http://ps.sioe.cn/zixun/145.html
PS艺术照教程:制作照片折痕效果
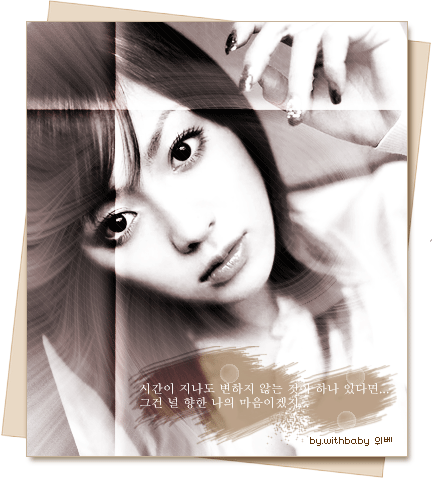
最终效果图
PS制作过程:
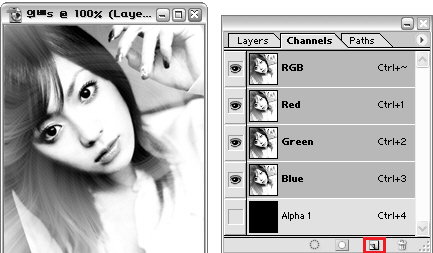
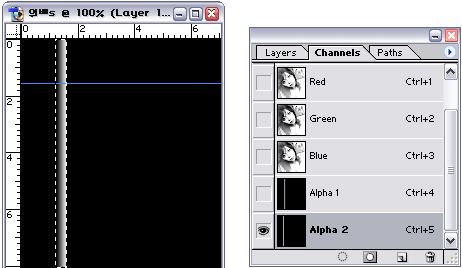
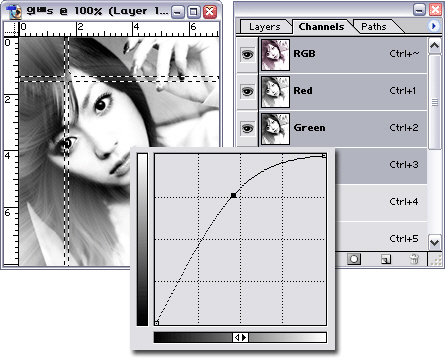
1:进入通道面板,点击“创建新通道”按钮。
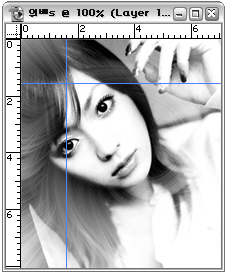
2:窗口-标尺(ctrl+R),从刻度处纵横方向分别拖拽出参考线,如图:
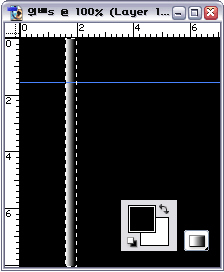
3:点击新建的Alpha 1通道,选择矩形选框工具(M),对准纵向参考线向右拖拽出一个矩形,选择渐变工具(G),将背景色前景色设置为黑、白(D、X),选择线性渐变白色-->黑色,按住shift如图拖拽。
4:再次创建新通道,选择矩形选框工具(M),对准参考线向左拖拽,渐变方向相反。
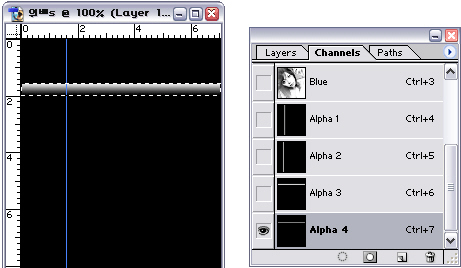
5:同样的方法制作通道3、4。
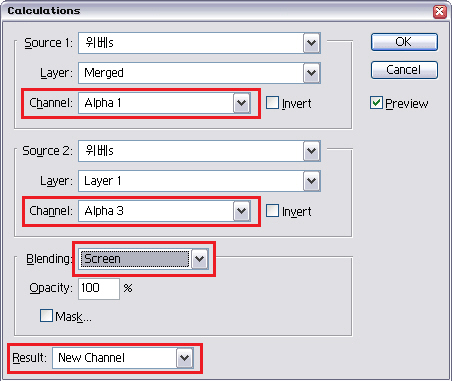
6:编辑-计算,设置源1:Alpha1通道、源2:Alpha3通道,模式滤色(屏幕),结果-新通道。
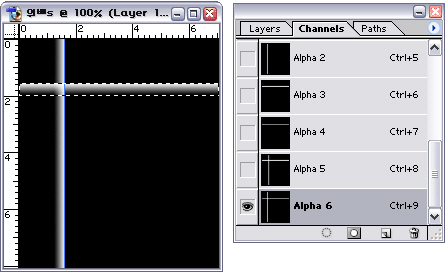
7:同样的方法计算出2、4两个通道的混合通道。
8:选择Alpha5通道,点击“将通道载入选区”按钮,出现选区后点击RGB通道,ctrl+M执行曲线命令,调整如图:
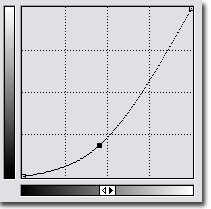
9:选择Alpha6通道,载入选区,ctrl+M执行曲线命令调整如图:
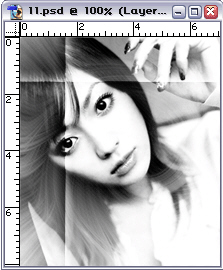
效果图:
最终效果图:
