用Photoshop设计打散效果的笔记本电脑海报
Step 5:
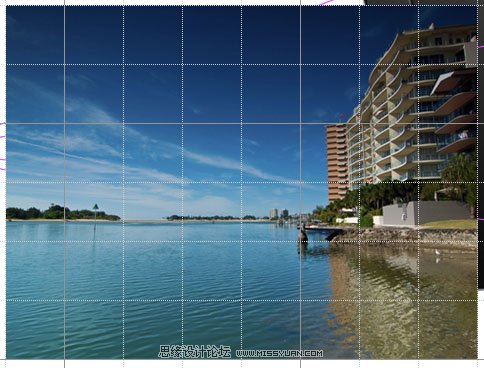
Now create a new layer set called ‘photo 1′. Paste in the image that you want to manipulate. View a grid over your image and then use the free transform tool to resize your photo to fit nicely into the grid squares. Make sure that the photo fits into an even number of grid squares for it’s height and width. In this example the photo is resized to be 8 grid squares wide and 6 high.
5.新建图层,命名为“photo1”,把我们要操作的图片素材置入,显示网格。
使用自由变化工具,调整图片贴合网格,本例刚好是8个网格宽、6个网格高。
Step 6:
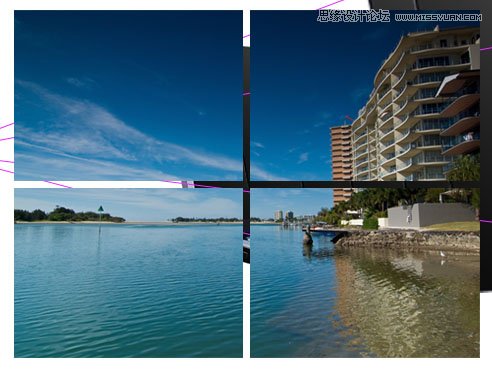
Now duplicate your photo layer, as you want to retain a copy. Be sure to hide the duplicate layer and go back to your original. Select your single column marquee tool from your selection palette (it’s under the Rectangle and Elliptical marquee tools). Using your grid click the grid line that marks the center point of your image and delete a central 1px column. Then switch to the single row marquee tool and do the same to delete a 1px line across the center of your image. You want these lines to be a little larger than 1px though, so grab your magic wand tool and click somewhere outside of your photo image. This will select all of the area surrounding the photo, but also the 1px lines cutting through it. Then go to select>modify>expand and expand the selection by 3px. Then hit delete to achieve an effect like the image below:
6.复制“photo1”图层,重命名为"photo2",作为备份,隐藏"photo2".
来到“photo1”图层,选择“单行矩形选择工具‘,沿着网格线依次删除1px的内容,得到如下图所示效果。
如果觉得1px的间隔太窄的话,可以取得选取后,通过”选择“ -”修改“-"扩展" 值设为3px,获得更大的选区,然后删除内容,获得更大的间隔。
Step 7:
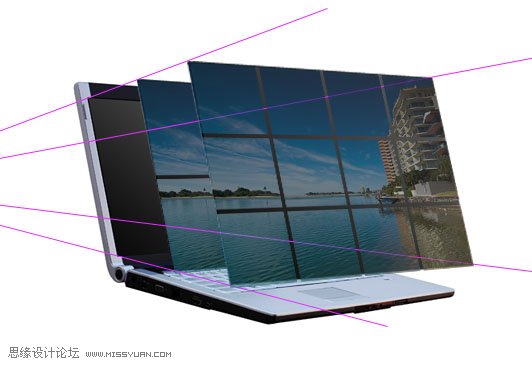
Now hide all of your duplicate laptop screens except the smallest one (the one that is 60% of the size of your largest). With your photo layer selected (the one you’ve just cut up using the grid) go to edit>transform>distort and distort the photo so that it fits exactly over this smallest laptop screen image. To fit it well you make need to reduce the layer’s opacity to allow the screen underneath to show though. The image below shows the transformed photo layer at 57% opacity, allowing some of the screen underneath to show through. Be sure to move this photo layer below the next largest laptop screen layer, so that it is mostly covered by it.
7.现在隐藏所有的图层仅保留最小的一个图层(60%屏幕尺寸那副)。
选中”photo2“,”编辑“-”变换“-”扭曲“,使图片复合屏幕大小。
然后把图层的不透明度设为57%,让底层的内容区部分可见。
Step 8:
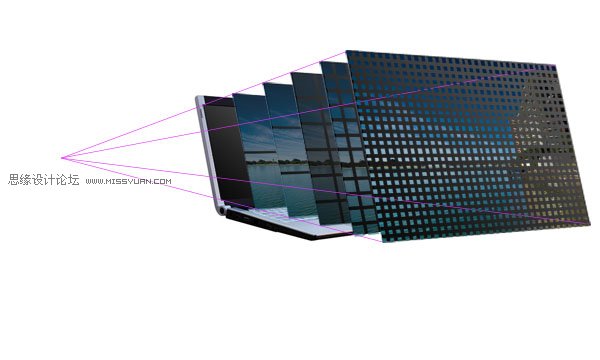
Now go back to your original photo layer. Duplicate it again, and using the same technique as before with the single row/column marquee tools cut it into 2X2 squares using the grid. As the image is 8 squares wide and 6 high, this will result in 12 squares each 4 grid squares in size. Again, use your magic wand tool to select the area around the photo and the lines cutting through it, then expand your selection by 3px and hit delete. Then use the distort transform tool to fit your new image to the 2nd smallest laptop screen. Remember again to move this photo layer behind the next largest laptop screen layer. The image below shows the result of this, with the photo layer again at 57% to allow me to nicely fit it to the screen image beneath.

Step 9:
Now repeat these steps, but make your squares half the size each time. So using the grid that will then be 1X1, 1/2X1/2, 1/4X1/4. To cut the photo into 1/2 and 1/4 grid square pieces I would recommend just using your judgement, but if you want to be really picky you can use rulers. Another tip is to duplicate the photo after cutting it into the squares, as this will save you having to repeat the slicing process right from the start each time.
9.重复此过程,确保每次单个方格的尺寸是上次的一半即可。
所以我们使用的网格单位依次为1*1、1/2X1/2和 1/4X1/4。
| 上一页1234下一页 |